My husband has just recently become lactose intolerant, so ice cream (which was his go to dessert) is no longer an option. Because of this he switched to cakes about 3 months ago. This is good and bad. They don’t generally require refrigeration which is great for our small-ish RV fridge, but they are expensive if bought pre-made, and I also like cake which is not good for my waistline.
Because of the price, I have been trying to perfect making cakes at high altitudes in our tiny RV oven. Let’s just say that my first few attempts were more like cake crumbs held together by icing.
After some research and a little trial and error here is what I found works…
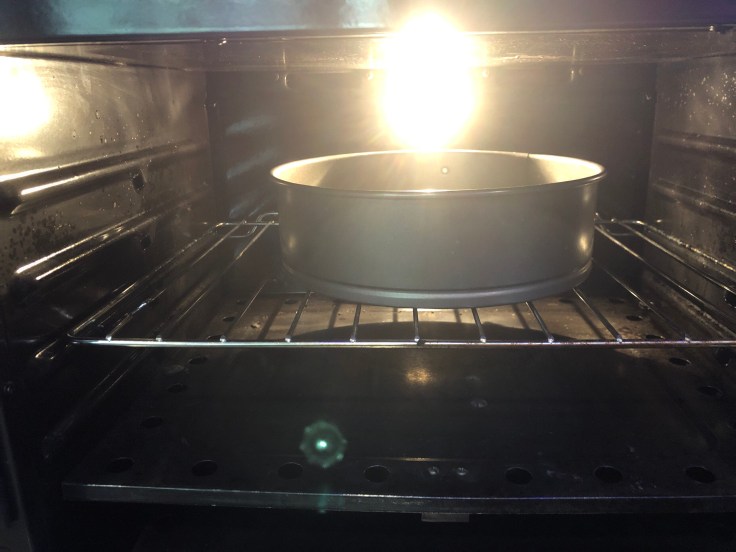
Use a spring form pan. Seriously, this made a huge difference in getting the thing out in one piece. For a single box cake (yep, I use boxed cakes), I use a 9″ one that came in a set of three from Walmart for around $9.

You need to grease and flour the bottom and sides (of the inside) of the pan. I use Crisco, but butter should work also. Then layer the bottom with parchment paper (cut to fit the circle) and grease/flour that also. Yep, you double up.
For my RV oven, I always increase cooking temp by 25f no matter what I’m making. For cakes, I increase mine 50 degrees f. So 375 for my specific cake mix (your mix and oven may be a little different, so play with it).
When mixing your cake, follow the directions on the box, but add (extra):
1/4 cup flour
2tbs water
1tbs oil
1egg
I place the cake pan with mix on the second level from bottom. And set the timer for the lowest time listed for “two 9″ rounds”.
For this cake it was 24 minutes. Then I check it, and add 5 minutes until it’s done.
There are a couple methods to testing to see if it’s ready. 1) the good old toothpick test to see if it comes out clean, and/or 2) checking to see if the cake has separated from the sides of the pan and top is turning golden in spots. I use both.
I cool my cakes on a rack until coolish to the touch. You can let them cool however long you want, but if you pull the pan too soon you might find trouble.
When ready, remove the spring form sides, then place a plate/cake platter on top of the cake and flip it over. You should be able to pull the bottom and parchment paper off easily.
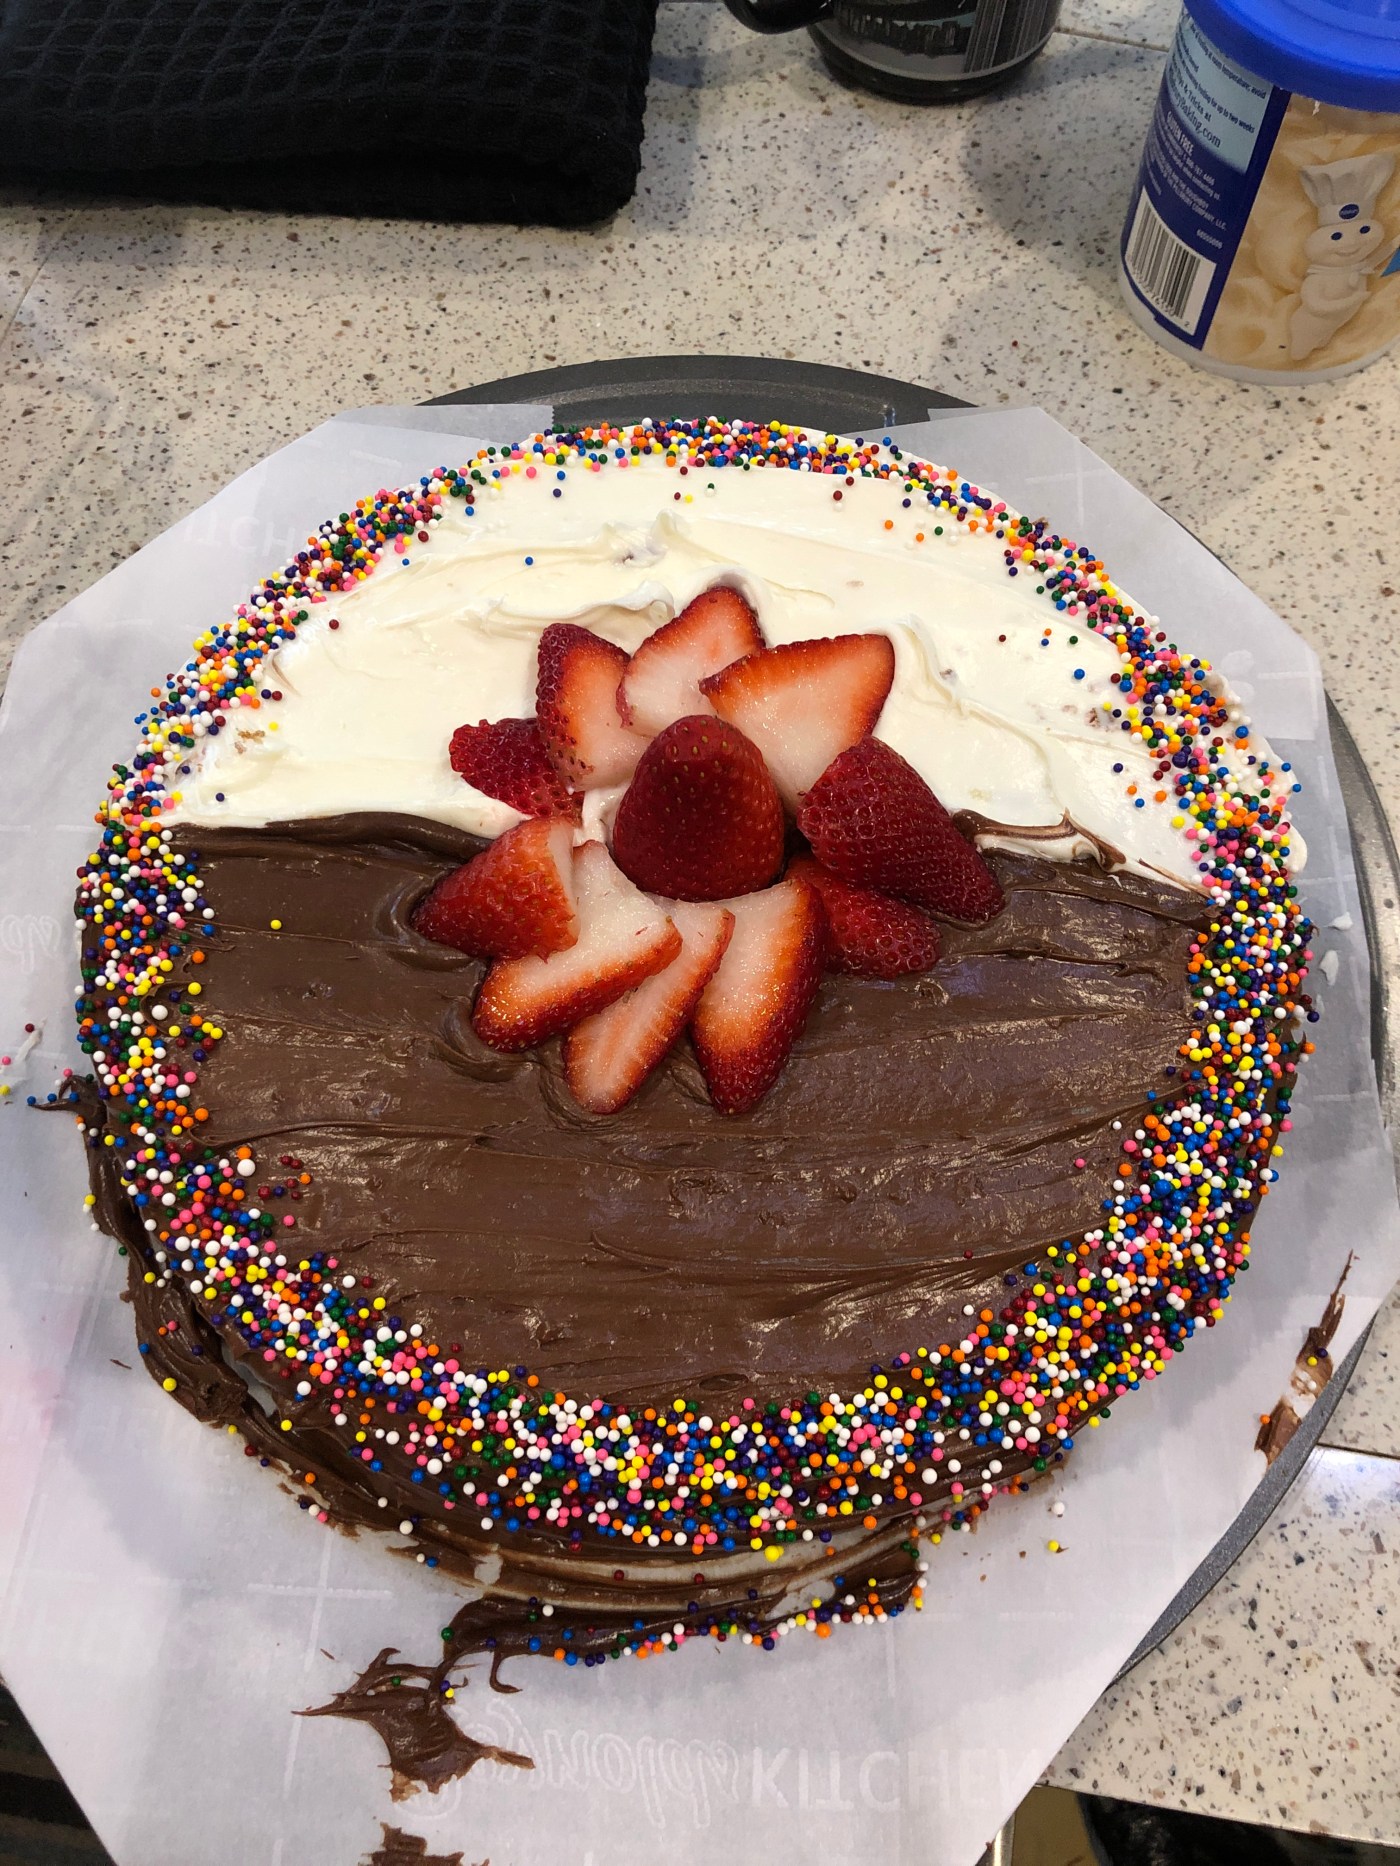
To make your single pan cake a two layer cake, use a long bread knife to slice it down the middle. Then carefully lift the top off and set aside while you ice the bottom layer.

A trick I’ve found for using store bought icing is to heat the tub up (after you remove the lid and foil), for about 15 seconds in the microwave. Stir well before applying.
Place the second layer back on top of your iced lower layer. I leave the bottom facing up (as the top layer) as it’s flatter and firmer for final icing.
Then ice with the remaining icing, sprinkles and/or fruit as you please.
Enjoy!


That’s beautiful!
LikeLike